Showing posts with label In The Kitchen. Show all posts

Friday, December 9, 2011

Homemade Lemon Curd


Lemon curd is not at all as its name suggests – to me, “curd” brings to mind lumps in cottage cheese, or perhaps something curdled such as sour milk. But the name could not be more misleading, for lemon curd is a delicious, smooth, sweet-tart custard-like condiment that can be used interchangeably with jam as a spread, or as a filling, as an ingredient in a filling.  Lemon curd can be purchased in the jelly and jam section of the market.  But it is easy to make your own.
 
Lemon curd is delicious when spread on a piece of homemade bread or scones (especially blueberry scones).  

Lemon Curd
Makes 2 jars, 8 ounces each.
  • 3 eggs
  • 1 stick of butter, softened
  • 1 cup plus 1 tablespoons sugar
  • 1/3 cup lemon juice
Whisk the eggs in a saucepan with the butter, sugar, and lemon juice. Place over very low heat, and stir until mixture is thick and smooth. Pour into two 8-ounce jelly jars and cover.  If mixture becomes lumpy, whir in blender only until smooth. Pour into jars.

Curd will thicken further as it cools. Stored in the refrigerator, it will keep up to 6 months.

Note: It is better to use a double boiler to keep the mixture from scorching. If you use a regular saucepan, stir constantly and occasionally use a rubber scraper on the bottom and sides of the saucepan to prevent sticking.

Wednesday, November 30, 2011

Hamburgers and Gravy


One of Pierce's favorite foods is Hamburger.  I guess that just comes from being a 21 year old fella!  While he was home over Thanksgiving break I planned to make hamburgers for dinner one evening.  You know what they say about the best laid plans?  Yep, something came up and I had to leave the house knowing I wouldn't be back in time to get dinner on the table at a reasonable hour.

My solution was to patty out the hamburgers, sear them in a skillet and place them in the crockpot.  I then blended together one cup of cold water and 1/2 cup of  homemade "instant gravy mix" and poured it over the hamburgers.  Set the crockpot to low and left the house. 

The Photographer and Pierce opened a jar of home canned green beans and helped themselves to the last of the bread I made yesterday.  I do not have a photo to post because there were no leftovers for me when I got home.  Bad boys!  They say, in their defense, that they were the best "hamburgers" ever.

Homemade Instant Gravy Mix

1 1/3 cups instant nonfat milk powder
3/4 cup instant flour
3 tablespoons instant beef bouillon granules
1/8 teaspoon ground thyme
1/4 teaspoon onion powder
1/8 teaspoon ground sage
1/2 cup butter or margarine
3 teaspoons brown sauce for gravy 

Combine milk powder, instant flour, bouillon granules, thyme, onion powder and sage. Stir with a wire whisk to blend. Cut in butter or margarine until evenly distributed. Drizzle brown sauce for gravy over mixture. Stir with wire whisk until blended. Spoon into a 3-cup container with a tight-fitting lid. Label with date and contents; store in the refrigerator. Use with 4-6 weeks. -- Makes about 2 2/3 cups

To make Beef Gravy, combine 1 cup of cold water and 1/2 cup gravy mix in small saucepan.  Whisk constantly over medium heat until smooth and slightly thickened.  ** I didn't cook the gravy first, just mixed it up and dumped it in the crockpot.

Wednesday, November 23, 2011

Another Excellent Pork Recipe


While browing through my vintage Julia Child cookbook looking for an easy pork recipe, I happened upon this dish.

Wow!  This is so delicious that the Photographer request I make it again next week.  Serve with rice to soak up all the sauce, green beans sauteed in a little olive oil and seasoned with Italian Seasoning and a loaf of crusty bread and you will be in culinary heaven.  I am quite certain that this recipe would be just as captivating by substituting chicken for the pork.

4 Pork Chops (I slice a pork loin myself because we like our chop really thick!)
1 shallot, minced
1 clove garlic, minced
3 tablespoons olive oil
Salt/pepper to taste
1 tablespoon thyme
1 teaspoon allspice
1 cup white wine
1 cup heavy cream

Pat chops dry with paper towels and season one side with salt, pepper, half the thyme and allspice.  Heat oil in skillet until almost smoking and place chops in skillet seasoned side down.  Season the other half of the chops with remaining spices, salt and pepper to taste.  Cook until just done and remove to a platter to keep warm.  Stir in shallots, saute until translucent.  Stir in garlic and cook for 1 minute.  Add the wine and reduce by half.  Stir in the cream and heat through.  Pour some of the sauce over the chops and serve the remaining sauce on the side.  

** Note:  I like my sauces on the thicker side so I mixed 1 tablespoon cornstarch with 2 tablespoons of cream and stirred it into the sauce at the last minute.

Thursday, November 17, 2011

Apple Pie Muffins


This recipe is so good I just had to share!  Apples are currently is season and this is a delicious way to utilize the autumn harvest.  Not only are these muffins easy to make and tasty, but they are also a filling and warming breakfast for those cool mornings.  Feel free to substitute your favorite variety of apple in this recipe. 

Apple Pie Muffins

2 1/4 cups all-purpose flour
2 teaspoons pumpkin pie spice
1 teaspoon baking soda
1/2 teaspoon kosher salt
1 egg
1 cup buttermilk
1/2 cup butter, melted
1 teaspoon vanilla extract
1 1/2 cups packed brown sugar
2 cups peeled, chopped Granny Smith Apples
1/2 cup packed brown sugar
1/3 cup all-purpose flour
¼ cup rolled oats
1 teaspoon ground cinnamon
3 tablespoons butter, melted

 Line 12 cup muffin cups with paper liners. Set aside.

In a large bowl, whisk together 2 1/4 cups flour, pumpkin pie spice, baking soda, and salt. In a small bowl, whisk together the egg, buttermilk, 1/2 cup melted butter, vanilla and 1 1/2 cups of brown sugar. Stir until sugar has dissolved.

Pour butter mixture into the flour mixture and stir until just combined. Gently fold in apples. Use a large scoop to fill each muffin well, filling the cups to the top.

In a small bowl, stir together 1/2 cup of brown sugar, 1/3 cup flour, rolled oats, and cinnamon. Drizzle in 3 tablespoons of melted butter, mixing until well blended. Sprinkle this over the tops of the muffins.

Bake at 375 degrees for 25 minutes, or until the tops of the muffins spring back when lightly pressed.
Cool on wire rack. Store at room temperature

Monday, November 14, 2011

Homemade Vanilla Extract


With the weather turning cooler and the holidays almost upon us, I am choosing to "not shop" much and focus my efforts on homemade or handmade gifts. 

As an avid baker, vanilla extract is a pantry staple for me.  But it can be so expensive! Cheap brands can be found most anywhere but they don’t have that real, true vanilla flavor that makes baked goods taste so delicious.  Imitation vanilla extract contains vanillin, which is a synthetic version of vanilla’s natural flavor compounds.  Most popular grocery store brands of both imitation and “genuine” vanilla extract may also contain corn syrup and caramel color.

This year I decided dispense with the artificial ingredients and make your own homemade vanilla?  It is very simple to do and you only need two ingredients: vanilla beans and plain Vodka. It takes approximately three minutes to assemble a large jar and within a couple of weeks you will have a large batch of homemade vanilla extract that adds a clear, true vanilla flavor to your recipes.

Did you know that there are three types of vanilla bean, any of which can be used for vanilla extract, according to your preference:

Madagascar or Bourbon vanilla. This is the bean with the smooth, sweet flavor that’s typically available as extract in the United States.

Mexican vanilla. This has a very full flavor that’s often described as creamy and spicy.

Tahitian vanilla. These beans are known for their intense floral aroma.

To make homemade vanilla:  Using a sharp knife, split 4 vanilla beans lengthwise.  Spread the two halves apart to reveal the vanilla seeds.  Place the split beans in a quart sized mason jar and fill the jar with vodka.  Store at room temperature. After about two weeks, the vodka will have colored (who needs caramel color?).  

Once my homemade vanilla is ready, I am planning to decant it into smaller bottles.  I plan to purchase a muffin tin and a set of measuring spoons, add a bottle of my homemade vanilla with the recipe for Vanilla Bean cupcakes attached and give as gifts for those other avid bakers and vanilla lovers on my list.

Vanilla Cupcakes
  • 1 cup cake flour
  • 1 teaspoons baking powder
  • 1/2 teaspoon fine salt
  • 6 tablespoons unsalted butter at room temperature
  • 3/4 cup granulated sugar
  • 1/2 tablespoon homemade vanilla
  • 1 large egg white, at room temperature
  • 1 large egg, at room temperature
  • 1/4 cup plus 2 tablespoons whole milk, at room temperature
Heat the oven to 350°F and arrange a rack in the middle. Line muffin pan with paper liners.

Combine flour, baking powder, and salt in a medium bowl and whisk to break up any lumps; set aside. Place butter in the bowl of a stand mixer fitted with the paddle attachment and beat on medium-high speed until very light in color, about 3 minutes. Add sugar and continue beating until the mixture is airy, about 3 minutes.

Scrape down the paddle and the sides of the bowl, turn the mixer to medium speed, and add the egg white, beating well. Then add the egg, beating well.  Add the milk and vanilla and mix until combined (the mixture will look curdled, but it’s not). Scrape down the sides of the bowl. Reduce the speed to low, add the reserved flour mixture, and mix until just combined, about 15 seconds.

Fill the muffin wells about halfway and bake until the cupcakes are golden brown and a toothpick inserted into the center comes out clean, about 18 minutes. Set the pans on a wire rack and let cool for 5 minutes. Remove the cupcakes from the pans and let cool completely before frosting.

Vanilla Frosting
  • 2 cups powdered sugar
  • 2 tablespoons butter, softened
  • 2 tablespoons milk
  • 1/2 teaspoon vanilla
Combine all ingredients and beat on medium speed until smooth and fluffy.

Thursday, October 20, 2011

Oven Roasted Honey Pork Loin


This is a delicious, yet simple dish.  And it is elegant enough to serve to company.  I served the pork with oven roasted potatoes and a tossed salad.  The Photographer rated the meal a "10".

Ingredients:
  • 2-3 pound pork loin
  • Salt and pepper to taste
  • 1/4 cup honey
  • 1 cup dry white wine, divided
  • 2 tablespoons olive oil
  • 1 teaspoon dried thyme
  • 1 teaspoon dried basil
  • 1 teaspoon lemon zest
Directions:
Trim off any excess fat and silver skin from the loin.  Season the pork with salt and pepper to taste and place in roasting pan that has been coated with cooking spray. 

Mix together the honey, 1/2 cup white wine, olive oil, thyme, basil and lemon peel in a small bowl.  Pour over the pork loin. Pour remaining 1/2 cup white wine into the roasting pan.

Bake at 375 degrees for 45-60 minutes or until a thermeter inserted in the loin registers 150 degrees.  Place pork on serving platter and let rest 15 minutes.

Strain the pan juices into a saucepan.  Boil over medium heat for 3 minutes.  Remove from heat.

Slice pork to desired thickness, arrange on serving platter and drizzle with sauce.  Serve remaining sauce on the side.

Serves 4.

Tuesday, October 11, 2011

Pickled Peaches


The Photographer arrived home a few weeks ago toting a 20 pound box of freshly picked organic peaches from one of our neighbor's orchards.  I spent the next two days in the kitchen - making Peach Salsa, Peach Preserves, Peach Pie Filling and Peach Ice Cream. 

At the Photographer's request, I canned 6 jars of Pickled Peaches.  I had never tasted these before and for some reason assumed I wouldn't like them.  We opened a jar last night and they are so good!  Somewhat reminiscent of Christmas in my opinion. These are so tasty and easy that I will definitely be making more of these next year.

Tuesday, June 28, 2011

Chocolate Souffle


In as many years as I have been cooking, I have never baked a souffle.  I have always been rather afraid to try – thinking that it would be too much work, that souffles are fragile and difficult to get to the table without deflating, etc.

I finally gathered enough courage to attempt chocolate souffles and am now kicking myself for all those years I spent without chocolate souffle in my life.  We all rated these an 11 - on a scale of 1 to 10!

Loosely translated, the world soufflé means “full of air.” To get a souffle “full of air” you fold in whipped egg whites.  I used a recipe that I found on-line – with a few modifications.  I used 3 ounces of  bittersweet and 4 ounces semi-sweet chocolate, added 1 teaspoon of espresso powder to the melted chocolate and used powdered egg whites.  I dusted them lightly with confectioner's sugar before serving.

You really owe it to yourself to try this. You can find the recipe here.

Tuesday, June 14, 2011

Favorite Kitchen Herbs


I ventured to the Farmer's Market this past weekend.  Although it is still a little early for vegetables in our area I did come home with several pots of herbs.  Parsley, Rosemary, French Tarragon and Basil.  These are the ones I use most for cooking and, somehow, not a single one of my herbs survived this past winter. 

See the aloe plant in the back?  Fantastic for soothing burns.  Pierce gave me this plant for Mother's Day in 1996.  It was a kindergarden "class science project" - meaning the children divided small pups from a large mother plant and cared for them for an entire semester before presenting them to their mothers as gifts.  Isn't that just the sweetest idea? 

All my new herbs are now nestled in larger pots on the back patio, just a few steps from the kitchen.  And they are already providing with cuttings for my kitchen endeavors, while being kept company by the aloe and a few potted flowers. 

Friday, June 10, 2011

A Bread Tutorial

While baking a loaf of bread for dinner yesterday, I decided to document the process via photographs.  I used this recipe, which is easy to make and produces a tasty loaf. 

I placed the yeast in my mixing bowl, added the water, sugar and salt and mixed well. (I use my Kitchen-Aid stand mixer to make all my bread). Then I added flour (King Arththur all purpose for this loaf) a little at a time and mixed the dough until everything was thoroughly incorporated. 


I covered the bowl with a towel and let the dough rise for an hour.  Then I heavily dusted my hands with flour, took the dough out of the bowl and (continuing to dip my hands in flour) I shaped the dough into a free form loaf.  I placed the dough onto a piece of parchment paper, covered with a towel and let rise for another hour.


After the second rising, I preheated my oven to 350 degrees and slashed the top of the loaf with a sharp knife.  I use a Pampered Chef baking stone to bake my free form loaves of bread and I always place my stone on the oven rack before pre-heating the oven - this way it preheats along with the oven and is extremely hot when I place the bread (still on the parchment paper) on it.


I bake the bread for approximately 30 minutes or so.  You will know when it is done when the loaf is a deep golden brown and sounds hollow when tapped on the top.  Remove from the oven and (if you have enough willpower) let it cool a while before eating.


As this is a free form loaf, we didn't slice it - we just grabbed a big chunk to eat.  And it was delicious!

Thursday, June 9, 2011

Quiche a la Julia Child

While browsing through my cookbooks, I always keep a pad of post-it notes handy to mark the recipes I want to try in the near future.  Before getting 100 pages into the book, I gave up with the post-it notes because I was tagging nearly every page!

I had already decided that I was definitely going to make the Chicken Kiev and dutifully copied all the ingredients that I would need to purchase onto my grocery store list.  Except for the chicken!  So, as you can guess, I did not make Chicken Kiev for dinner last night!  But it is on the menu for one night next week.

Instead, I decided to try one of Julia's quiches.  And I am so glad I did.  I made the pastry and pre-baked the shell.  Then I mixed eggs, heavy cream, salt and pepper together.  I lined my cooked and cooled pastry shell with fresh, blanched asparagus and then crumbled a small piece of smoked salmon over the vegetable.  Poured the egg mixture on top of the asparagus and salmon and topped with about 3/4 cup of grated Gruyere cheese.  Baked it until it was puffed and set (about 40 minutes) and let it cool 10 minutes before slicing.


Oh my stars!  We have had quiche before, but none this tasty.  The Photographer said it was one of the best things he has ever eaten and Pierce gave it a 9.5 rating (on a scale of 1 to 10).  His explanation being that he doesn't really think that quiche should be dinner (not hearty enough).  He thinks it would be fantastic at a breakfast/bruch buffet though.

I am now super excited to try the Chicken Kiev recipe.  And I made sure to write "Chicken" on my grocery store list (and underlined it in red!)

Friday, June 3, 2011

From Julia's Kitchen


I recently discovered that The French Chef program is airing once again on the cooking channel (2pm daily Monday through Friday in my area).  Now, I freely admit that I adore the movie "Julie and Julia" and even went so far as to purchase the book (which was promptly thrown into the trash before I could even get a third of the way through - utter trash in my humble opinion).  But I have loved Julia Child since I was a small child watching her on PBS with my momma.  (We also watched Justin Wilson and Nathalie Dupree.  I think I would eat everything Nathalie cooks - not sure I would eat anything Justin made but it sure was fun to watch him)! 

But seeing Julia on PBS made me think, even as a 5 year old, that I could probably cook too.  She was so funny (I loved to listen to her talk) and she seemed as if she was having the time of her life while whipping up Boeuf Bourguignon or Champignons a la Grecque.  My momma noticed my fascination and soon I was in the kitchen helping her with dinner preparations.  So I guess I owe my love of all things culinary to Julia Child and my momma.

I was browsing through the local used book store last week and happened upon "From Julia Child's Kitchen".  Which is a compilation of the recipes she cooked during the 72 French Chef tv shows (color tv, not black and white) as well as a few of her recipes that have been re-worked from her previous cookbooks to include the use of the newest kitchen gadgets such as the "electric super blender food processor".  What a treasure!  And only $2!

I foresee many "french inspired" dinners on my table in the near future!

Wednesday, May 25, 2011

Easy Homemade Bread

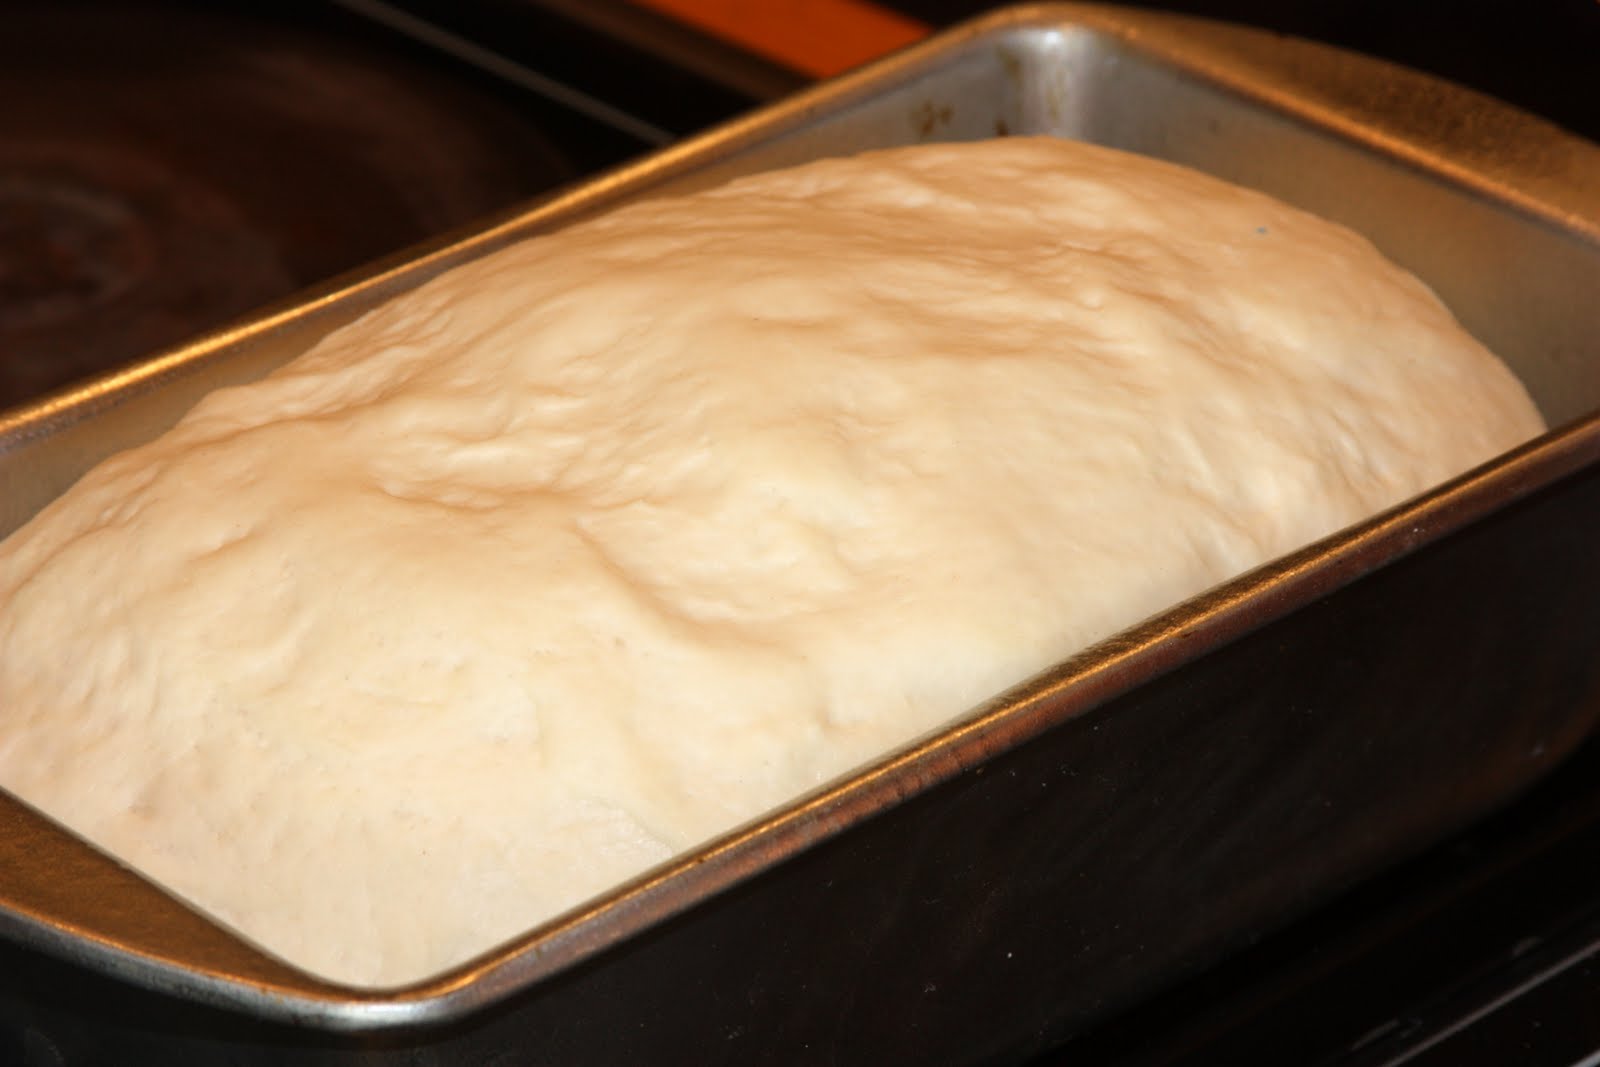
Homemade bread - second rising

Because there is little that I adore more than fresh, warm from the oven homemade bread slathered with real butter, I make bread on a daily basis.  And while the "5 minute a day"  bread has its place, I find it just as easy to use my grandma's recipe.  This is the recipe she taught me (and my momma) to make bread with many years ago and it is still, hands down, my favorite recipe.  It is a simple and basic, but most delicious bread.

Grandma Lucy's Bread
Makes one loaf, can be doubled

1 1/2 cups warm water
1 teaspoon yeast
1/2 teaspoon salt
2 tablespoons sugar
3 1/2 cups flour (approximate)

In large bowl combine yeast, sugar, salt and water, let sit for 5 minutes.  Stir in flour, a little at a time until it becomes too difficult to stir.  Add a little more of the flour and begin kneading. Add more flour as necessary and continue kneading until smooth and elastic. Place in a large well greased bowl and let rise until doubled - approximately 1 hour.  Sprinkle with a little more flour, punch down and knead again just a little bit. 

Shape and place in a greased loaf pan. Let rise for another hour.  Bake at 350 degrees for 25-30 minutes. When done, the bread will be a lovely golden color and sound hollow when tapped on the top.  Turn bread out onto a cooling rack.  If you are like me - force yourself to wait 10 minutes, then cut off a rather large chunk of warm bread and smear with 6 tablespoons of real butter (I exaggerate - but not by much, lol).  If you are not like me, leave the kitchen and let the bread cool completely before slicing.

As a side note, if you position the bread sideways on your cooling rack, and lay the bread on its side to cool, the rack will leave perfectly spaced indentions in the bread - which help you to cut uniform slices of bread.

Once you are confident in making this bread - go ahead and experiment.  I have used this recipe to make cinnamon rolls, pepperoni rolls, pizza crust, herb rolls, etc.

Friday, May 20, 2011

A Cake for My Boys


I don't dislike eating cake, mind you, but given the choice I would much rather have pie.  Cherry, please.  Serve it up with some homemade vanilla ice cream and I promise to be your slave.  But my boys (I count the photographer here, tee hee) prefer cake to pie. And when one sweetly requests (okay, begs) that I make a cake, how can I refuse?

The proper title of this cake is "Heath Bar Cake".  However, my guys don't really care for Heath bars (this I cannot fathom!) so I left them out.

This is so simple that I don't really consider it to be "cooking".  Prepare a boxed german chocolate cake mix as directed and bake in a 13x9 pan.  When cake tests done, remove it from the oven and immediately use a wooden toothpick or skewer to poke holes all over the cake.  Pour one jar of caramel ice cream topping all over the cake and then pour one can of sweetened condensed milk all over the cake.  (Both of these will be absorbed into the holes you just poked).

Refrigerate until well chilled.  "Frost" with cool whip and garnish with a few chopped up Heath bars.  I skipped the Heath bars and grated some bittersweet chocolate on top instead.

A very simple, gooey, sweet that delights my boys (and their friends).

Thursday, May 5, 2011

Smoked Turkey


Most people I know bake a ham for Easter.  My boys can't seem to agree on a ham they both like.  The Photographer prefers a "country" ham while Pierce would rather have a "city" ham.  The difference being a country ham is salt cured and needs to be soaked for up to 48 hours in water before cooking and a city ham is sugar cured and requires no special handling other than being baked. 

I do cook both types of ham throughout the year but baking 2 different hams for each holiday was becoming a little tedious and so they agreed a long time ago to compromise and decided that smoked turkey was their holiday meal of choice.

It's a fairly simple but long process - definitely worth the end result.  We have a smoker but it takes FOREVER to cook that way and I finally decided that I could do just as well with our charcoal grill.

Smoked Turkey

1 large whole turkey or turkey breast
3 tablespoons Worchestershire Sauce
3 tablespoons canola or corn oil
1 tablespoon onion powder
1 tablespoon brown sugar
2 tablespoons salt
1 tablespoon black pepper
1/4 ro 1/2 teaspoon cayenne pepper (or to taste)

Wood chips (can be purchased at the grocery store)

Loosen the skin on the turkey by running your hand between the skin and flesh.  Mix together the Worchestershire sauce and oil and brush over the skin and meat.  Mix together the spices (I do this in a plastic baggie to ensure that the brown sugar gets evenly distributed).  Rub the spice mixture over the entire turkey - under the skin, on the skin and inside the cavity if cooking a whole turkey.  (This step can be done the night before and the turkey refrigerated.  Remove the turkey from the refrigerator and let sit for an hour before cooking.)

Soak the wood chips in water (at least 30 minutes).

Start charcoal in the grill.  Once ready, evenly divide coals on both sides and place a large metal bowl or cast iron dutch oven in the center of the coals.  Fill the bowl with water. You can also place the turkey in a large disposable aluminum  baking dish and forgo the water, just be sure to divide the charcoal so that the turkey is cooking via indirect heat.

Place the turkey on the center of the grill rack.  Scatter a few wood chips on top of the hot coals.  Lower the lid and open the grill vents approximately half way to allow the chips to begin smoking. 

Check the turkey hourly, adding more chips as necessary.   The turkey is done when the juices run clear.  Cooking time depends on how much charcoal you use and how hot they get.  I use about a half a bag of charcoal and it takes 3-4 hours to cook a large turkey breast (6 hours for a whole turkey).  When done, remove from grill and let sit for 30 minutes for the juices to redistribute.  Carve and serve.

Tuesday, April 26, 2011

Homemade Yogurt

Breakfast Time


I adore yogurt.  But what I don't love are the sugar, additives and cost of the yogurt available at my local grocery store. Years ago I purchased a yogurt maker - you know the kind I am talking about.  The one with all the little cups and lids.  Difficult to store, difficult to clean and I wasn't impressed with the amount of yogurt it made for all the time and effort necessary to produce approximatley 2 cups of yogurt!

So I was absolutely thrilled to find this recipe and couldn't wait to try it!  It does take time but there is very little actual work involved in the process.  Much of the time involved is just the culturing process - no actual effort, just waiting.  It is cheaper and tastes so much better than store bought yogurt.  And the best part is that you use a crock pot - so cleanup is a snap too! It is simple, easy and frugal.

The main ingredient, of course, is milk. Whole milk (not ultra-pasteurized) works best.  It gives you the thick  yogurt like you purchase at the store. After sitting in the refrigerator for a day, it becomes even thicker. Yogurt also requires an active culture starter. Yogurt cultures can be purchased but it’s easier to use yogurt from the store. You only need 1 cup so I purchased a small container when they were on sale.  The most important thing is to make sure the yogurt has "live cultures" listed on the carton - not all yogurt does

This recipe makes approximately 1/2 gallon of unsweetened yogurt.  To sweeten, stir in a little jam or honey.  You can also top it with granola or fresh fruit.

Easy Homemade Yogurt

1/2 gallon whole milk
1 cup plain yogurt with active cultures
1/2 cup powdered milk

Pour 1/2 gallon of milk into crockpot, cover and turn on HIGH.  Cook for approximately 2 hours, until the milk is almost boiling.  Turn the crockpot off, remove lid and let the milk cool a bit.  You should be able to stick your finger into the milk and keep it there for approximately 10 seconds or so (it takes my milk about 40 minutes to cool down enough).

Stir in powdered milk til dissolved.  Stir in yogurt and mix well.  Return lid to crock pot and wrap entire pot in a large beach towel.  Let sit for 8-12 hours.  Some people place the towel wrapped pot into an unheated oven to prevent drafts and keep the crock warmer for a longer period of time.  I don't and my yogurt turns out fine.

Remove towel and lid, stir yogurt and put it into containers.  Refrigerate until ready to use.

Monday, April 18, 2011

Anna's Fig Cake


I found this advertisement, which contains a recipe for "Anna's Fig Cake" in a 1918 edition of Good Housekeeping magazine.  I haven'the made the cake yet, but I fully intend to do so this week.  Although I believe I will use another type of frosting.

Anna's Fig Cake

1 1/2 cups flour
1 cup sugar
3/4 cup milk
3 teaspoons baking powder
3 egg yolks
3 teaspoons butter
1 teaspoon vanilla

Frosting

2 eggs whites beaten stiff with 4 tablespoons powdered sugar

Filling

1 pound of figs, finely chopped
1 "teacup" of water
1/2 cup sugar
1/2 teaspoon vanilla

All cooked to smoothness

Monday, April 11, 2011

Another Blog

Although I will continue to post here, I have started another blog as well. 

I collect recipes/cookbooks and wanted a place to store my collection.  Each day I post a different recipe.  Some I have tried, some I hope to try someday.  Check it out here and if you try a recipe, please let me know what you think!

Wednesday, March 23, 2011

The Fruits of My Labor


The "fruits" of my labor

I spent the entire day yesterday in the kitchen.  Our local high school marching band held a fundraiser and I purchased three flats of whole strawberries. I canned 16 half pints of strawberry jam, canned 8 half pints of strawberry syrup, canned 8 quart jars of concentrate for strawberry lemonade this summer and froze 8 quart baggies of strawberries.

We had strawberry shortcakes for dessert last night and I will be making strawberry muffins for breakfast this morning.  Then I am done with strawberries for a while!